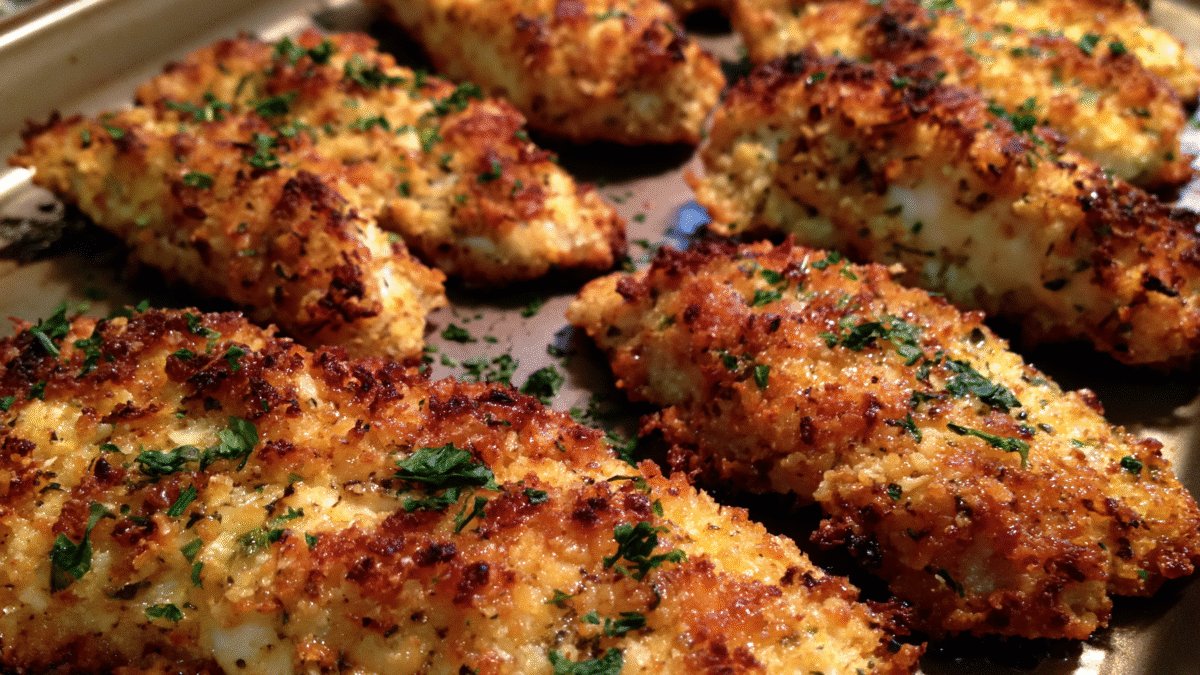
Crispy Baked Chicken Tenders

Craving crispy, golden chicken tenders but don’t feel like dealing with a pot of bubbling oil? Good news: your oven can handle the job, and you won’t have to clean grease splatters off your kitchen afterward. Sounds like a pretty sweet deal, right?
These Crispy Baked Chicken Tenders deliver everything you love about classic fried chicken: a crunchy, golden coating, juicy chicken inside, and plenty of delicious seasoning. The secret? Toasted panko breadcrumbs, a hot oven, and a few simple tricks that make all the difference.
Whether you’re preparing a quick family dinner, making snacks for game night, or satisfying a serious chicken craving, this recipe has you covered. Grab your favorite dipping sauce because things are about to get delicious.
Prep time: 15 minutes | Cook time: 18–22 minutes | Servings: 4
Why This Recipe Is Awesome
Let’s be honest. Chicken tenders have a special talent for making everyone happy. Kids love them, adults secretly love them more, and nobody complains when they appear on the dinner table.
But why make them in the oven instead of frying?
First, you get a wonderfully crunchy coating without deep-frying. Toasting the breadcrumbs before baking gives them a head start, creating that gorgeous golden color without relying on a vat of oil.
Second, this recipe keeps things simple. You don’t need expensive ingredients, complicated equipment, or professional cooking skills. Just a few pantry staples and a little patience.
And the best part? You can customize the seasoning however you like. Want spicy chicken tenders? Add cayenne. Prefer something cheesy? Mix Parmesan into the breadcrumbs.
Plus, these tenders work beautifully for meal prep. Make a batch, refrigerate the leftovers, and reheat them for a quick lunch the next day.
Ingredients You’ll Need
Nothing fancy here. Most of these ingredients probably already live somewhere in your kitchen.
For the Chicken
- 1½ pounds chicken tenders – Or slice boneless, skinless chicken breasts into evenly sized strips.
- 1 cup panko breadcrumbs – The secret weapon for an extra-crispy coating.
- ½ cup all-purpose flour – Helps the egg mixture stick to the chicken.
- 2 large eggs – Hold that delicious crunchy coating together.
- 2 tablespoons olive oil – For toasting the breadcrumbs.
- 1 teaspoon garlic powder – Because garlic makes almost everything better.
- 1 teaspoon paprika – Adds color and a little smoky flavor.
- ½ teaspoon onion powder – A small addition with a big flavor payoff.
- ½ teaspoon salt – Adjust according to your preference.
- ¼ teaspoon black pepper – Adds just enough kick.
- ½ teaspoon Italian seasoning – Optional, but delicious.
- Cooking spray – Helps the coating crisp up in the oven.
Optional Dipping Sauces
- Honey mustard
- Ranch dressing
- BBQ sauce
- Buffalo sauce
- Garlic aioli
- Sweet chili sauce
My recommendation? Honey mustard and crispy chicken tenders make a seriously good combination. Sweet, tangy, crunchy… what more could you want?
Step-by-Step Instructions
Ready to turn ordinary chicken into something deliciously crispy? Follow these simple steps.
1. Preheat Your Oven
Preheat your oven to 425°F (220°C).
Line a large baking sheet with parchment paper or place an oven-safe wire rack over the baking sheet. Lightly coat the rack with cooking spray.
A wire rack allows hot air to circulate underneath the chicken, helping both sides develop a crispy coating.
2. Toast the Breadcrumbs
Heat the olive oil in a large skillet over medium heat.
Add the panko breadcrumbs and stir frequently for about 3–5 minutes, until they turn lightly golden.
Transfer them to a shallow bowl and let them cool slightly.
Don’t skip this step! Toasting the breadcrumbs gives your chicken tenders that beautiful golden color before they even enter the oven.
3. Prepare Your Breading Station
Grab three shallow bowls.
In the first bowl, combine the flour with half the salt and pepper.
In the second bowl, whisk the eggs until smooth.
In the third bowl, combine the toasted panko with the garlic powder, paprika, onion powder, Italian seasoning, and remaining salt and pepper.
Congratulations. You’ve officially created a tiny chicken-tender assembly line.
4. Coat the Chicken
Pat the chicken tenders dry with paper towels.
Dip each piece into the flour, shaking off any excess. Next, coat it in the beaten eggs, then press it firmly into the seasoned breadcrumbs.
Press the breadcrumbs onto every side of the chicken to create a thick, crunchy coating.
Try to keep one hand for wet ingredients and the other for dry ingredients. Otherwise, you’ll end up breading your fingers too.
5. Arrange on the Baking Sheet
Place the chicken tenders on your prepared baking sheet or wire rack.
Leave a little space between each piece so the hot air can circulate properly.
Lightly spray the tops with cooking spray for extra crispiness.
6. Bake Until Golden and Crispy
Bake for 18–22 minutes, depending on the thickness of your chicken tenders.
If you’re baking directly on parchment paper, flip the tenders halfway through cooking.
Check the thickest piece with a meat thermometer. The chicken must reach an internal temperature of 165°F (74°C) before you serve it.
7. Serve and Enjoy
Remove the chicken tenders from the oven and let them rest for 2–3 minutes.
Serve immediately with your favorite dipping sauces, crispy fries, roasted vegetables, or a fresh salad.
And yes, eating one straight from the baking tray absolutely counts as quality control.
Common Mistakes to Avoid
Even an easy chicken tender recipe can go sideways if you overlook a few details. Fortunately, these mistakes are simple to avoid.
Skipping the Breadcrumb Toasting
Want golden, crunchy chicken? Give your breadcrumbs a little attention first.
Untoasted panko can remain pale even after the chicken finishes cooking. Toasting creates better color and flavor.
Overcrowding the Baking Sheet
If you squeeze every chicken tender into one tiny corner, they’ll steam instead of crisp.
Leave space between each piece. Use two baking sheets if necessary.
Using Uneven Chicken Pieces
Thick chicken strips take longer to cook than thin ones.
Cut your chicken into similar-sized pieces so everything finishes cooking around the same time.
Forgetting to Pat the Chicken Dry
Excess moisture makes it harder for the flour and breadcrumbs to stick.
A quick pat with paper towels makes the coating process much easier.
Overbaking the Chicken
Nobody wants dry, rubbery chicken pretending to be dinner.
Start checking the internal temperature near the end of the suggested cooking time. Once it reaches 165°F, remove the chicken from the oven.
Alternatives & Substitutions
One reason I love recipes like this is their flexibility. You can change a few ingredients and create an entirely different flavor.
Make Them Gluten-Free
Replace the all-purpose flour with a gluten-free flour blend and use gluten-free panko breadcrumbs.
You’ll still get a deliciously crunchy coating.
Try Regular Breadcrumbs
Don’t have panko?
Regular breadcrumbs work, although they create a finer, less airy crust. Panko remains my top choice for maximum crunch.
Add Parmesan Cheese
Mix ¼ cup finely grated Parmesan into the breadcrumb mixture.
It adds a savory, slightly nutty flavor that pairs beautifully with the garlic and paprika.
Make Spicy Chicken Tenders
Add ½ teaspoon cayenne pepper or chili powder to the breadcrumb mixture.
You can also serve the tenders with spicy buffalo sauce for an extra kick.
Use Chicken Breasts
No chicken tenderloins? No problem.
Slice boneless, skinless chicken breasts lengthwise into strips of similar thickness. They’ll work just as well.
Try an Air Fryer
Cook the breaded chicken tenders in a preheated air fryer at 400°F (200°C) for approximately 10–14 minutes, turning halfway through.
Cook in batches without overcrowding, and check that the center reaches 165°F.
FAQ (Frequently Asked Questions)
1. How do I make baked chicken tenders extra crispy?
The secret lies in toasting your panko breadcrumbs, using a hot oven, and avoiding overcrowding.
A wire rack also helps because it allows air to circulate around the chicken. Want even more crunch? Give the breaded tenders a light coating of cooking spray before baking.
2. Can I make crispy baked chicken tenders ahead of time?
Absolutely!
You can bread the chicken a few hours ahead and refrigerate it until you’re ready to bake.
For the best texture, keep the chicken refrigerated and bake it shortly before serving.
3. Can I freeze these chicken tenders?
Yes, and they’re great for preparing meals in advance.
Arrange the breaded, uncooked tenders on a baking sheet and freeze until firm. Transfer them to a freezer-safe container or bag.
For best quality, use them within 2–3 months. Bake directly from frozen, allowing extra cooking time, until the chicken reaches 165°F internally.
4. Why aren’t my chicken tenders crispy?
Usually, moisture or overcrowding causes the problem.
Make sure you pat the chicken dry, toast the breadcrumbs, and leave space between each tender.
Also, don’t lower the oven temperature too much. That high heat helps create the crispy exterior.
5. Can I make this recipe without eggs?
Definitely.
Try using plain Greek yogurt or a thin layer of mayonnaise to help the breadcrumbs stick.
Both options work, although they create slightly different flavors and textures.
6. What should I serve with crispy baked chicken tenders?
Honestly, the possibilities are endless.
Some delicious options include roasted potato wedges, sweet potato fries, coleslaw, mac and cheese, steamed broccoli, or a simple green salad.
Want an easy family dinner? Pair the chicken with oven-baked fries and homemade honey mustard sauce.
7. How do I store and reheat leftovers?
Store leftover chicken tenders in an airtight container in the refrigerator for up to 3–4 days.
To reheat, place them in a 375°F (190°C) oven for about 8–10 minutes, or until hot throughout.
Avoid the microwave when possible. It heats the chicken quickly, but it also softens that beautiful crunchy coating. And after all that effort, why let the microwave ruin the party?
Final Thoughts
These Crispy Baked Chicken Tenders prove that you don’t need a deep fryer to enjoy seriously crunchy, flavorful chicken.
With a handful of everyday ingredients, toasted panko breadcrumbs, and a hot oven, you can make a satisfying meal that works for busy weeknights, family dinners, or casual weekend snacking.
The recipe is simple enough for beginners but delicious enough to earn a permanent spot in your dinner rotation. And once you start experimenting with different seasonings and dipping sauces, you’ll discover plenty of ways to make it your own.
So grab your chicken, preheat that oven, and get ready for some golden, crunchy goodness.
One final piece of advice: make extra dipping sauce. You’ll thank yourself later.

20 Easy Chicken Dinner Recipes You’ll Actually Make – Plated Simple
[…] Get the full recipe […]